Introduction
There are some desserts that just whisper “comfort” with every delicious bite, and an Old Fashioned Blackberry Cobbler is undoubtedly one of them. This rustic, soul-satisfying treat embodies everything wonderful about home baking: a bubbling, jammy fruit filling crowned with a tender, biscuit-like topping. It’s the kind of dessert that brings people together, conjuring images of lazy summer afternoons, family gatherings, and the simple joy of seasonal ingredients transformed into something extraordinary. Forget fussy pastries; the beauty of a cobbler lies in its unpretentious charm and its ability to deliver pure, unadulterated deliciousness.
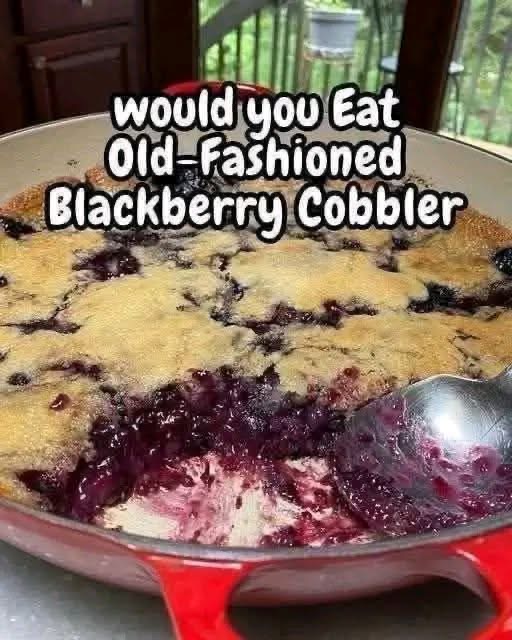
What makes this particular blackberry cobbler “old-fashioned”? It’s a nod to simpler times, using classic techniques and readily available ingredients to create a dessert that tastes just like Grandma used to make. We’re talking about a rich, sweet-tart blackberry base that’s perfectly balanced, and a tender, slightly crisp topping that’s somewhere between a biscuit and a cake – designed to soak up all those glorious fruit juices. There’s no fancy trickery here, just honest-to-goodness baking that celebrates the vibrant flavor of fresh blackberries at their peak. It’s a dessert that feels both nostalgic and utterly timeless.
For me, the smell of a blackberry cobbler baking instantly transports me back to my childhood summers, picking sun-warmed berries until my fingers were stained purple. My grandmother would always declare that the best way to enjoy a day’s harvest was in a bubbling cobbler, served warm with a generous scoop of vanilla ice cream melting into its nooks and crannies. This recipe aims to capture that magic, delivering a dessert that’s easy enough for a beginner baker but impressive enough for any occasion. Get ready to fill your kitchen with the irresistible aroma of summer and create a new favorite tradition.
Nutritional Information
Per serving (approximate values):
- Calories: 380
- Protein: 5g
- Carbohydrates: 60g
- Fat: 15g
- Fiber: 6g
- Sodium: 250mg
Ingredients
For the Blackberry Filling:
- 6 cups fresh or frozen blackberries (if frozen, do not thaw)
- 3/4 cup granulated sugar (adjust to sweetness of berries)
- 1/4 cup all-purpose flour or cornstarch (for thickening)
- 1 tablespoon fresh lemon juice
- 1 teaspoon vanilla extract
- 1/4 teaspoon ground cinnamon (optional)
- Pinch of salt
- 2 tablespoons unsalted butter, cut into small pieces
For the Cobbler Topping:
- 1 1/2 cups all-purpose flour
- 1/2 cup granulated sugar, plus 1 tablespoon for sprinkling
- 2 teaspoons baking powder
- 1/2 teaspoon salt
- 1/2 cup (1 stick) unsalted butter, very cold and cut into small cubes
- 1/2 cup buttermilk (or regular milk with 1/2 teaspoon lemon juice/vinegar)
- 1 large egg, lightly beaten
Instructions
- Preheat your oven to 375°F (190°C). Lightly grease a 9×13 inch baking dish or a 9-inch cast iron skillet.
- Prepare the Blackberry Filling: In a large bowl, combine the blackberries, 3/4 cup granulated sugar, flour (or cornstarch), lemon juice, vanilla extract, cinnamon (if using), and a pinch of salt. Toss gently until the berries are evenly coated.
- Pour the blackberry mixture into the prepared baking dish, spreading it into an even layer. Dot the top of the berry mixture with the 2 tablespoons of small butter pieces.
- Prepare the Cobbler Topping: In a separate medium bowl, whisk together the 1 1/2 cups all-purpose flour, 1/2 cup granulated sugar, baking powder, and 1/2 teaspoon salt.
- Add the very cold, cubed butter to the dry ingredients. Using a pastry blender, two knives, or your fingertips, cut the butter into the flour mixture until it resembles coarse crumbs with some pea-sized pieces of butter remaining. This step is crucial for a flaky topping.
- In a small bowl, whisk together the buttermilk and the lightly beaten egg.
- Pour the wet ingredients into the dry ingredients with the butter. Mix with a fork until just combined. Be careful not to overmix; the dough will be slightly shaggy.
- Assemble the Cobbler: Drop spoonfuls of the cobbler topping over the blackberry filling. You can either drop them in distinct mounds, leaving some gaps for the filling to bubble through, or spread it more evenly for a more uniform crust.
- Sprinkle the remaining 1 tablespoon of granulated sugar evenly over the top of the cobbler topping. This will give it a lovely crisp, golden finish.
- Bake the Cobbler: Place the baking dish on a baking sheet (to catch any potential spills from bubbling fruit) and bake in the preheated oven for 35-45 minutes, or until the topping is golden brown and the fruit filling is bubbly and thick.
- Remove from the oven and let the cobbler cool for at least 15-20 minutes before serving. This allows the filling to set slightly and prevents it from being too runny.
Cooking Tips and Variations
To ensure your Old Fashioned Blackberry Cobbler is nothing short of perfect, consider these tips. To prevent a soggy bottom, especially if using very juicy berries, ensure you properly incorporate the flour or cornstarch into the filling; it acts as a thickening agent. You can also sprinkle a tablespoon of flour or cornstarch directly onto the bottom of your baking dish before adding the fruit. For a beautifully golden-brown topping, don’t skip sprinkling that extra tablespoon of sugar before baking; it caramelizes beautifully. If your topping is browning too quickly, you can loosely tent the cobbler with aluminum foil for the last 10-15 minutes of baking. When it comes to the berries, using ripe, firm blackberries will yield the best flavor and texture. If using frozen berries, there’s no need to thaw them first; simply toss them with the other filling ingredients as directed, and they might just need a few extra minutes in the oven. For variations, feel free to add a pinch of nutmeg or a teaspoon of orange zest to the filling for an extra layer of flavor. You could also swap out a quarter of the blackberries for raspberries or blueberries for a mixed berry cobbler. For a richer topping, replace some of the buttermilk with heavy cream, or for a spiced topping, add 1/2 teaspoon of ground ginger or cardamom to the dry ingredients.
Storage and Reheating
Leftover Old Fashioned Blackberry Cobbler should be stored in an airtight container or covered tightly with plastic wrap in the refrigerator for up to 3-4 days. While it’s best served warm, it’s still delicious cold. To reheat, you can warm individual servings in the microwave for 30-60 seconds until heated through. For a crispier topping, reheat larger portions in an oven preheated to 300°F (150°C) for 15-20 minutes, or until warmed through and the topping has crisped up slightly. Avoid overheating, as this can dry out the topping and make the filling too runny. You can also freeze baked cobbler for longer storage; wrap it tightly in plastic wrap and then aluminum foil, and it will keep for up to 2-3 months. Thaw overnight in the refrigerator and then reheat as directed above.
Frequently Asked Questions
Can I use other fruits instead of blackberries?
Absolutely! This cobbler recipe is very versatile. You can easily substitute other berries like raspberries, blueberries, or a mix of berries. Peaches, apples, or cherries would also work wonderfully, though you might need to adjust the sugar content based on the sweetness of the fruit and potentially add a bit more flour or cornstarch if the fruit is very juicy.
What is the difference between a cobbler, a crisp, and a crumble?
While often used interchangeably, these desserts have distinct toppings. A cobbler, like this recipe, features a biscuit-like or scone-like topping that is dropped onto the fruit filling in mounds, resembling a “cobbled” stone street. A crisp typically has a streusel-like topping made from flour, sugar, butter, and often oats, which bakes to a crispy texture. A crumble is very similar to a crisp but generally omits the oats in the topping.
My cobbler topping is too dry/crumbly, what went wrong?
If your topping is too dry or crumbly, it likely means you either didn’t add enough liquid (buttermilk/egg mixture) or you overmixed the dough. Overmixing develops the gluten in the flour, leading to a tougher texture. The dough should be just combined and slightly shaggy, not smooth like bread dough. Ensure your buttermilk is fresh and your egg is correctly sized. If it’s still too dry, you can add a tiny bit more buttermilk, a teaspoon at a time, until it comes together.